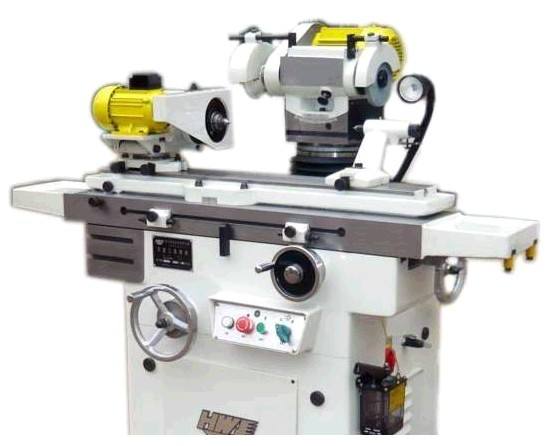
BT-150D 4-axis CNC tool grinder ultra-fine grinding is achieved by the ability to trim a large number of equal-grain abrasive micro-blades on the working surface of the grinding wheel. These high-grained micro-blades can remove a small margin from the surface of the workpiece with microscopic defects and micro-dimensional shape errors. So that high grinding precision can obtain. And in addition, due to a large number of contoured micro-edges, the grinding under the premise of appropriate cutting. A large number of extremely fine cutting marks can leave on the machined surface to obtain a very low surface roughness value. Since there is significant friction, slip, polishing and calendering in the non-sparking stage, the surface roughness value can be further reduced. Below BT-150D CNC tool grinder manufacturer Beijing Demina Precision Machinery co., ltd to introduce to you how to achieve tool grinding machine processing superfine grinding?

Overhaul of CNC tool grinder
1. Detection and repair of the guide rail of the grinding machine bed
the V-shaped guide rail of the bed should meet the following accuracy requirements after inspection. No straightness in the vertical plane ≤0.01mm/m. No straightness in the horizontal plane ≤0.01mm/m. Non-perpendicularity ≤ 0.02mm / 250m; contact point requires 12 ~ 14 points / 25mm × 25mm.
After the surface guide rail of the bed is inspected, it should meet the following accuracy requirements. The non-parallelism of the V-shaped guide rail is ≤0.02mm/m. The non-straightness in the vertical plane is ≤0.01mm/m. The contact point requirement is 12~14° /25mm×25mm.
2. The detection and repair of the sliding saddle rail
After the inspection, the V-shaped guide rail of the sliding saddle should meet the following accuracy requirements. The non-straightness in the vertical plane is ≤0.01mm over the entire length. The contact point is required to be 10~12 points/25mm×25mm.
The sliding saddle plane guide should meet the following accuracy requirements after inspection: the non-parallelism of the V-shaped guide rail is ≤0.02mm/m. The contact point is required to be 10~12°/25mm×25mm.
3. Clearance adjustment between the grinding wheel spindle and the bearing bush
BT-150D 4-axis CNC tool grinder paints the shaft of the grinding wheel spindle and turns it against the bearing bush. Scrape the surface of the bearing pad with a scraper to make the contact point reach 12~14 points/25mm×25mm, then install and adjust. The clearance between the grinding wheel spindle and the bearing bush is adjusted to 0.0025~0.005mm, which can avoid the edge of the workpiece during grinding.
4. The balance between the grinding wheel spindle motor and the grinding wheel
The vibration of the grinding wheel spindle motor has a great influence on the grinding surface roughness, so it is necessary to dynamically balance the grinding wheel spindle motor. For the grinding wheel, it needs to be balanced twice. Firstly, after the grinding wheel is finished with a diamond pen, a rough balance is carried out. Then the grinding wheel is finely repaired with the grinding wheel after the oil stone or the finishing car, and then a fine balance is performed.
Beijing Demina Precision Machinery co., ltd specializing in the production of various types of grinding machine equipment. Welcome users who need to come to consult the BT-150D CNC tool grinder price.


